
The blog caters the information regarding the basic idea of PowerApps which is a tool for building the mobile apps. While creating the blog we have assumed that you have a good knowledge regarding the PowerApps so only the brief information is provided considering the same and implementation steps are mentioned right from the scratch.
With less time and low custom software development cost, PowerApps have the capability to transform your business. It extends or customizes the apps which are already being used. PowerApps acts as a service for using existing business applications that consumes data stored in a data source – may it be SharePoint, Office 365, Microsoft SQL Server, Twitter, Common Data Service, and Salesforce. At times, mobile devices loses connectivity or there is limited connectivity with the Internet and it can be extremely useful for users especially field workers or users that travel
regularly, to continue working. App users may need to process data even when there is no or very limited Internet connectivity. To cater to these needs, PowerApps is able to cache data locally on a device. One can use this feature to build offline apps.
However, building a completely offline app is a manual task and it brings very difficult challenges such as Synchronization of data and Conflicts resolution.
There are a few questions that arise in mind while developing a completely offline app using PowerApps:
- What if two users modify the same record during an offline session?
- Is it possible to merge changes from both the users together?
- How to cope up with a situation where an online user deletes a record that another user modifies while offline?
- How to add and modify records in offline mode?
You will find out answers to these questions in this series of blogs. PowerApps provides a set of features that help mobile-app developers create offline-oriented apps. You can:
- Launch apps in PowerApps when offline
- Run apps when there is no or very little Internet connectivity
- Use Connection signal object to determine whether an app is offline, online or in a metered connection state.
- Utilize Collections and use basic data storage functions such as LoadData and SaveData for offline connectivity.
Note: Offline capability feature is still under implementation and not valid for all the scenarios.
Building Offline Capable Apps
The first query while working with offline scenarios is how apps work with data. Apps in PowerApps commonly access data through a variety of connectors provided by platforms such as SharePoint, Office 365 and Common Data Service. Custom connectors can also be built that enables apps to utilize RESTful endpoint services, for example, a Web API or Azure Functions. Users must be online to consume data as all these connectors make use of HTTPS.

Handling offline data
Let’s observe what happens when a device becomes offline. The app will continue to be mostly functional in the case of running app that becomes offline between the running sessions. PowerApps provides a set of capabilities to browser, filter, search, aggregate, manipulate and sort data in a consistent way irrespective of the data source utilized. This allows SharePoint programmers to reconsider an app using a different backend, enabling use of the local collections with very little change in app’s logic.
The landing screen i.e. the browser screen continues to show data even when the app becomes offline, while also providing search and sort options on the screen. Display screen opens up an individual record while edit screen enables modification of data.
It is important to note that the refresh button on the browser screen and the save button on the edit screen will not work unless in an active Internet connection. Due to the lack of Internet connectivity, if PowerApps fails to carry out an action, it displays an error message.
![]()
When a user starts an app in PowerApps in offline mode, the user can only retrieve app which was previously running on the device in online mode. In the case, where app loads in offline mode for the first time, it won’t show any data. The best way to run an app in offline mode is to enable ‘airplane mode’ in a mobile device.
Note: This blog requires that you have the prior understanding of PowerApps concepts such as controls, screens, events, attributes, navigation etc. More information regarding PowerApps.
Techniques to Enable Offline Working
There are two vital features that help us create an app that works offline:
Connection Signal
- The Connection signal provides information regarding the network connection information/status of an app.
Signal Property Description Connection.Connected returns true when a device is connected to a network Connection.Metered returns true when a network connection is metered - The connection signal determines whether the active connection is metered or connected.
- The connection on mobile devices is generally a metered connection. It is useful to detect a metered connection because you can configure your app to consume less data in case of a device having a metered connection.
Saving and Loading Local Data
- SaveData and LoadData functions enable us to build offline apps by storing collections of data in a private area on the local device.
Function Description Syntax SaveData Saves local data from a collection into a file SaveData(LocalBooks, “OfflineBooksFile”) LocalBooks > target collectionOfflineBooksFile > file LoadData Retrieves local data. Stores and encrypts data in an area isolated from other users and apps.
LoadData(LocalBooks, “OfflineBooksFile”, true)LocalBooks > target collection for data OfflineBooksFile > file name from which retrieve data. True > specifies whether a function should continue to proceed without error
if the file doesn’t exist.
Using LoadData, we can only retrieve data that is saved via SaveData function from the same app. We cannot load data saved in other apps.
Note: To build an app having offline capability is a highly customized process. The main purpose of this blog is to provide an idea of the challenges that exist to build offline apps.
“Best Books” PowerApps app with Offline Capability
Let us consider a simple custom list “Best Books” in SharePoint Online to capture best books with “Book Name” (renamed Title column), “Author” (Single line of text) and Image (Hyperlink or Picture – Format URL as: Picture) as three fields. Our app logic relies on other two important fields – ID and Modified. We will use the auto-generated ID field to uniquely identify records and Modified Date Time field to check when the changes have occurred during offline connectivity. For keeping it simple, we will not introduce any lookup column inside our list.
Note: Here, we will use SharePoint Online as a data source for our app. You are free to use any other data source like CDS, SQL etc. Offline implementation logic remains the same.
Create new PowerApps from your SharePoint Online list
SharePoint modern list experience provides the ability to create PowerApps directly from the UI.
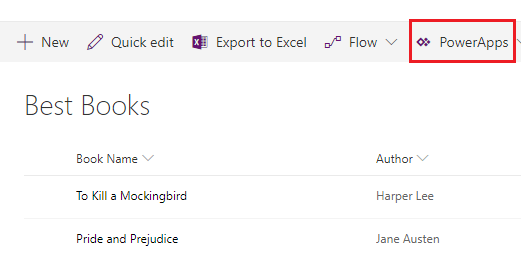
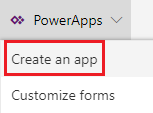
- Click PowerApps and then select Create an app
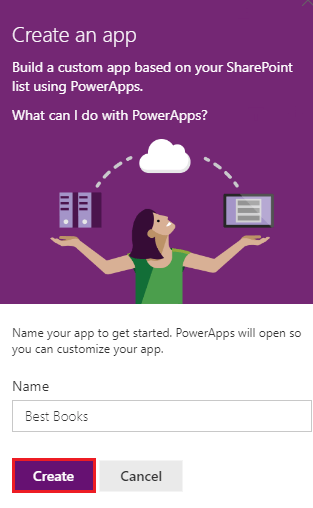
- Name your app “Best Books” in the PowerApps web designer in the right-hand pane and then click Create.
- Based on the list schema and data, PowerApps studio will automatically set up app screens for you. You can use PowerApps studio to customize your app to meet your functional requirements. The landing screen i.e. the browser screen will display all the items in the list.

- By default, “Attachments” field is visible on the browser screen. You can hide the field by selecting View -> Data Sources. It will open up data source from where the fields are populated.

- Select BrowserGallery1 from the left pane, expand Layout and change the Gallery Layout to “Image, title and subtitle”.
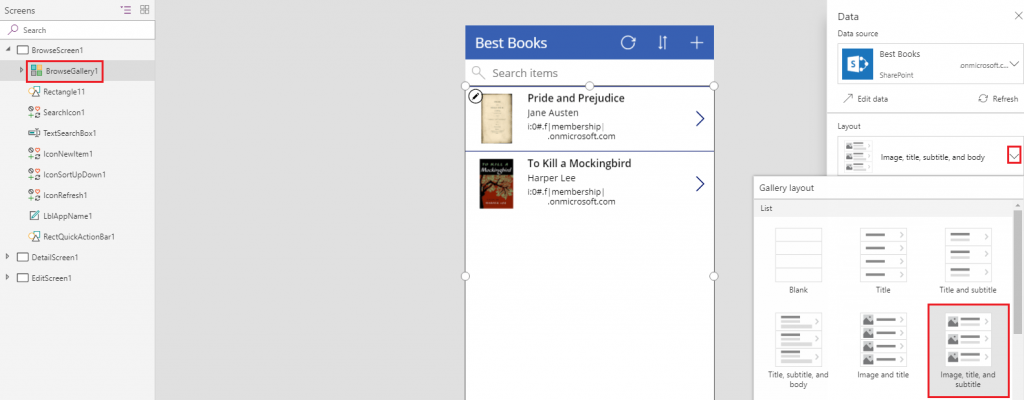
- App now displays only “Image”, “Book Name” and “Author”.

- Similarly you can hide “Attachments” from the edit screen too.
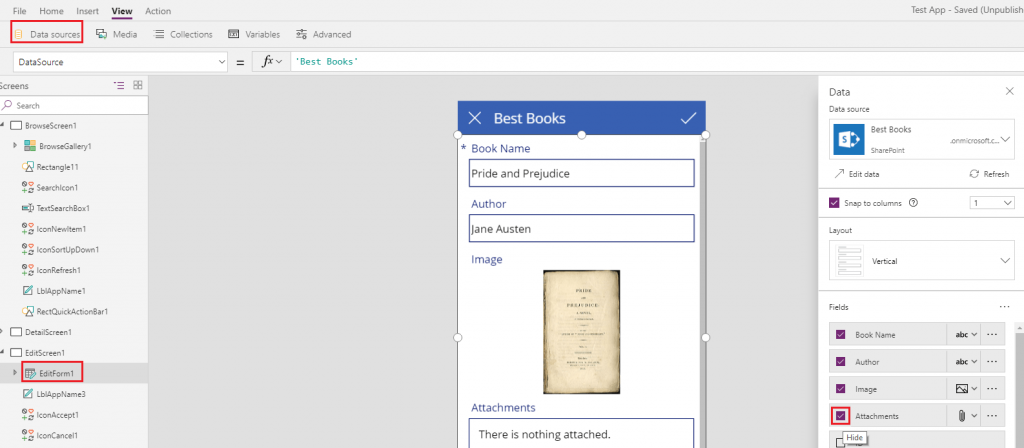
- Hide “Image” field from the edit screen, as the Picture column type is set read-only currently for PowerApps with SharePoint data source. Set Visible property “Off” for DataCard2.

Adapting an app working Offline
We have created an app that is based on a SharePoint list. The functionality will enable the users to view, add, update and delete items in offline mode. Keeping “Best Books” list entity in center, we will observe how offline capability will work with
SharePoint data source.
| Application start App copies SharePoint list “Best Books” into a local collection called BooksCollection | Best Books > BooksCollection |
| Working offline App stores offline changes in a local collection called BooksChanges | Offline changes > BooksChanges |
| Synchronizing changes App updates the item in SharePoint list and stores conflicting records in BooksChangesConflict collection |
BooksChanges > Best Books > BooksChangesConflict |
| Resolving Conflicts User can retain item in SharePoint or discard offline changes | BooksChangesConflict > Best Books OR > Discard |
Setting the Data Source to a Local Collection
When the app loads, we need to check if internet connection is available and also load the source data from SharePoint to the local collection. We will need to build offline cache of “Best Books” list. We will check whether connection is available through
PowerApps object called “Connection”. We need to add code to the OnStart rule of the browser screen. Below are the high level steps to accomplish this:
- Check if the internet connection is available when app is loaded.
- If the app is online, retrieve data from SharePoint list entity “Best Books” and put it in a local collection “BooksCollection”.
- Save the collected data to local storage (local cache) of your device, so that we can retrieve cached data in offline mode.
- If the internet connection is not available, retrieve saved data from local cache and populate collection from local cache.
- Utilize a new collection for later use to help synchronize records that have data modifications while in offline mode.
- Also, there will be a collection to store data conflicts.
Now, we are ready to show data in our app from the data source directly or the local storage based on internet connection availability.
Note: For now, you will receive error when you test app in browser and you can ignore that error. Please use mobile device to test LoadData and SaveData. Assumption is that you have started app at least once in online mode before you
test offline functionality.
Reconfigure Screens to use Local Collection
The next step is to rename all references of “Best Books” data source to BooksCollection. We will need to reconfigure all the screens inside the app to use BooksCollection local collection.
- Browse Screen1 > Browse Gallery1 > Items (Only show the “Title” and “Author” fields in the gallery, along with sorting and searching capability)
- DetailScreen1 > DetailForm1 > DataSource
- EditScreen1 > EditForm1 > DataSource
Refreshing the data
We need to update Refresh icon on the browser screen to save data to BooksCollection file after refresh occurs. We need to add code to the OnSelect rule of Refresh icon on the browser screen.
![]()
Building a Synchronization screen to handle Syncing of Data
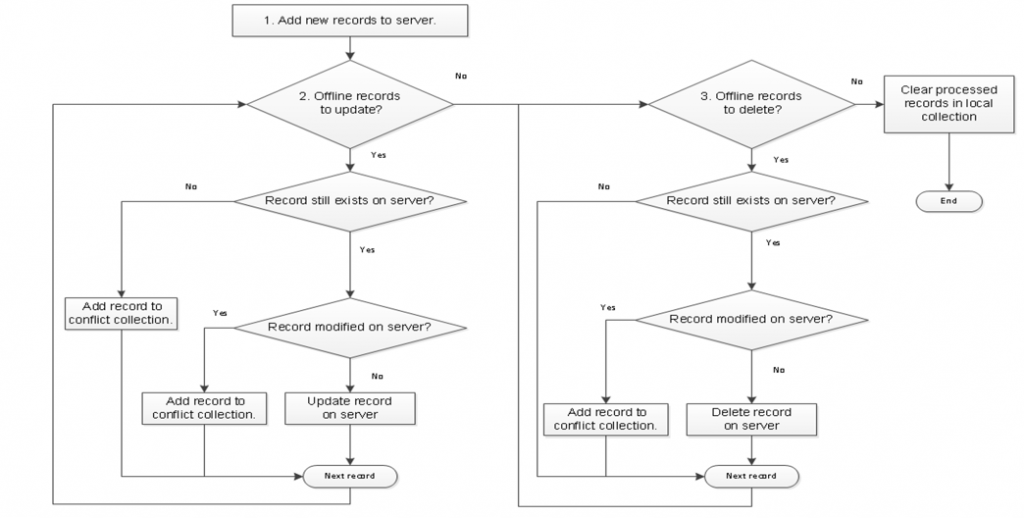
The next step is to build a synchronization screen to review and sync updated data. The screen displays a sync button which detects if the device is online and syncs data. Below is a flowchart of the synchronization process.
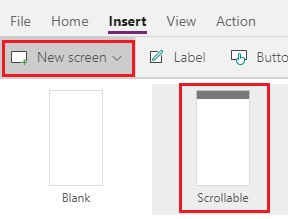
- Add a new screen of type Scrollable to build synchronization feature.
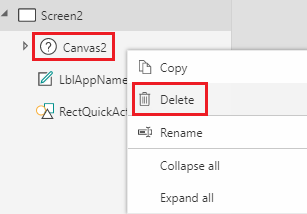
- Right click and delete inbuilt Canvas
- Rename synchronization screen to SyncScreen. Right click newly created screen and select Rename.

- Change the label text at the top to “Sync Offline Changes”.
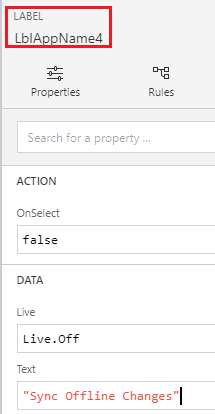
- Add a Gallery control of Vertical type and reset its positioning. To know more about Gallery Control.

Note: We will need to add two buttons at the bottom. So, keep appropriate space below the Gallery Control.
- Set the Items property of the newly added Gallery control to BooksChanges collection.
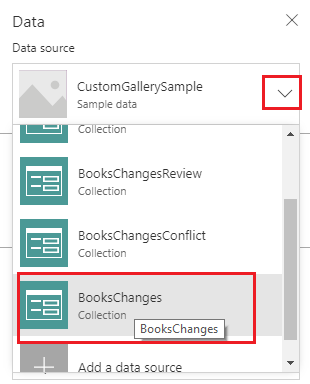
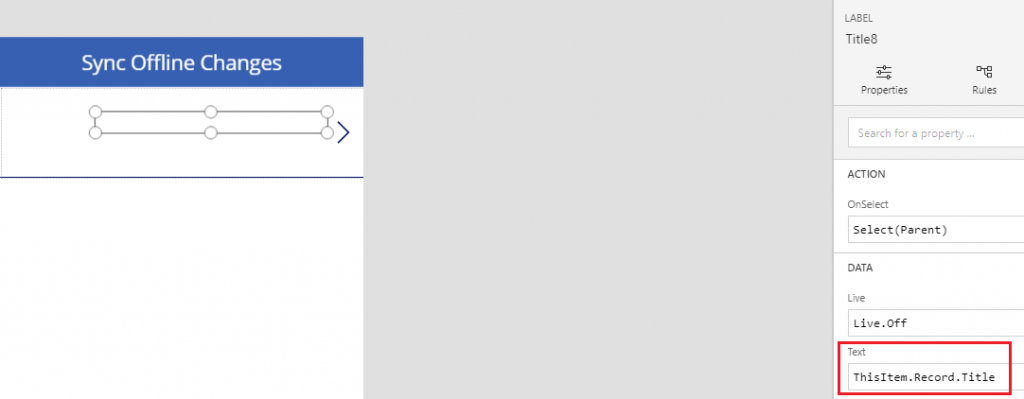
- We can use ThisItem.Record.<Fieldname> syntax to display a record from offline mode. Below is the image of Image property which is set for “ThisItem.Record.Image”

Similarly, you can set properties for Book Name and Author as “ThisItem.Record.Title” and “ThisItem.Record.Author0” respectively.
- Add a button below the gallery inside the synchronization screen to sync data from offline mode and rename the button text as “Synchronize”. Adjust the width and height of the button as needed.
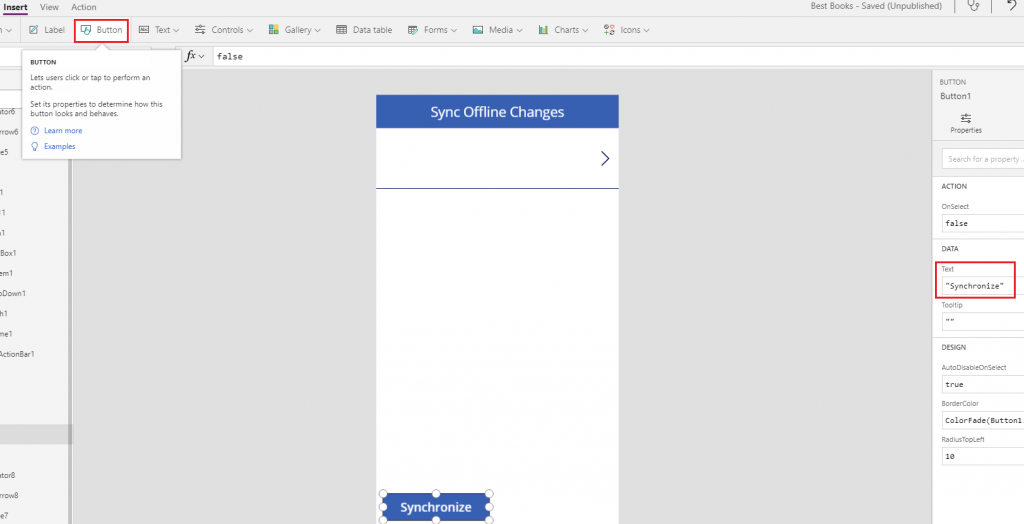
- We will need to add code on OnSelect property of the button for new records created offline and code to synchronize updated and deleted records. The code will carry out the process as described earlier in the flowchart.
Below are the high-level steps to accomplish this: The code works by processing offline record modifications from “BooksChanges” collection. Once all the data is processed, “BooksChanges” collection will be empty.
- Save added records from “BooksChanges” collection inside “Best Books” list.
- Refresh “Best Books” list
- For the item modified offline, retrieve a current record from “BooksChanges” collection and save it inside “BooksChangesReview”
- If source record is not found in “BooksChangesReview” collection, add the record to “BooksChangesConflict” collection
- Load and process records from “BooksChangesReview” collection which are not modified
- After these remaining items in “BooksChangesReview” are conflicting records. Add those records inside “BooksChangesConflict” collection.
- Retrieve offline deleted records and load into “BooksChangesReview” collection
- Delete records from “BooksChangesReview” collection which are removed from the server
- Remove the records from “Best Books” list which are deleted in offline mode.
- After this remaining records in “BooksChangesReview” are conflicting. Add those records inside “BooksChangesConflict” collection.
- Update local cache file to include changes
- Alert the user in case of conflicting records.
The code depends on the offline data modifications from the BooksCollection collection and once all the records are done, the collection will be empty.
- We can enable users to navigate to the conflict resolution screen by providing a “Conflicts” button on the synchronization screen.
- Add code on DisplayMode action to disable conflicts button in case of no conflicting records.
- Also, add code on OnSelect action of conflicts button to navigate to the conflict resolution screen.
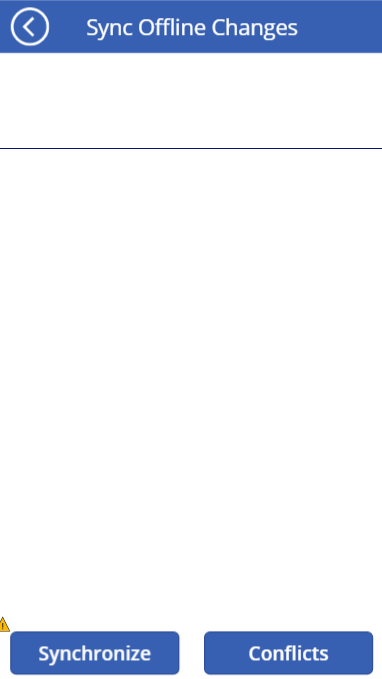
- Disable “Next” arrow from the gallery as it is not required. Instead, add a “Back” button at the top on sync screen.
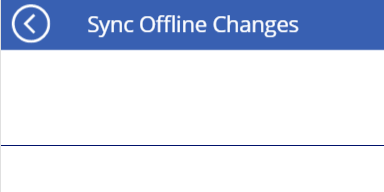
- Add code on OnSelect property of Back button on synchronization screen to navigate back to the browser screen.
- In order to navigate to the synchronization screen, add an icon on the browser screen.Open File menu and on the Content tab, choose Media and upload the required image.
 Press Esc to return to the workspace.Select Image under Media in the Insert tab
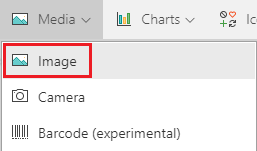 Provide its Image property with the name of the file you uploaded, adjust the size of the image as needed to place it on the left of Refresh icon and rename it to “SyncIcon”. Provide its tooltip as “Sync Offline data”.
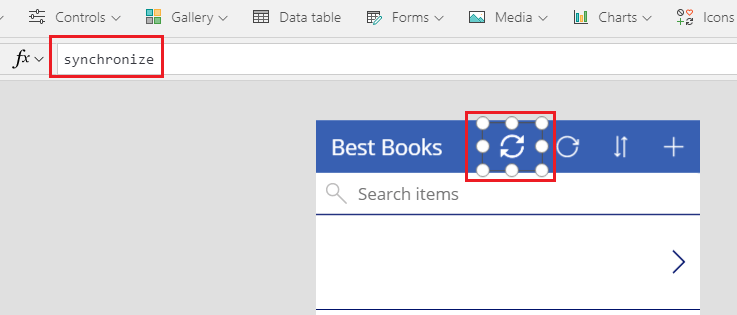
- Set the OnSelect property of newly added sync icon on browser screen to navigate to sync screen.
Disabling Icons and Buttons
We can disable a control inside an app using DisplayMode property. The property has one of the three values: Disabled, Edit or View. When the device is offline, we need to disable synchronization button on the sync screen.
Conclusion
We saw how to enable offline capabilities in PowerApps with SharePoint development. By default, the app in offline mode shows no data as it does not retain data for future offline sessions and it will throw an unexpected error. To cater to these needs, we discussed two features. First, PowerApps can store and load data from local cache files. Secondly, it provides an ability to SharePoint developers to check whether the connection is available and also if the connection is a metered one.
In the next blog of the series, we have provided an overview of handling offline add, update and delete a record as well as handling data conflicts.



Comments
Leave a message...